This is a lovely bracelet/bangle I bought in Copacabana, Bolivia. It was once a fork! The metal is heated and shaped with pliers then the embelishments are soldered on.
Showing posts with label Craft. Show all posts
November 07, 2011
October 03, 2011
Knitted Slouchy Hat
This is a bi-colored slouchy hat.
It's made of an alpaca wool blend.
I didn't really follow a specific pattern, just an eHow article on how to knit slouchy hats. I attempted to determine my gauge and calculate how many stitches I should need. Apparently I miscalculated because it ended up wayy too big. I thought of trying to felt it to make it smaller but that probably wouldn't have worked since it's not pure wool. I eventually sewed a seam down one side (what a shame) to make it fit.
Once complete I knitted this little flap into the brim. I didn't like how thick the tab was so I removed it and made a new smaller tab which you see in the first picture.
September 25, 2011
Clay Trout Tray?
I tried all sorts of objects to prop it up accordingly, in an attempt to maintain the 'tray' shape while drying: jewelry gift boxes, spoons, toothbrush cases, wooden ladle, the list goes on. I think this was the hardest part.. in the process, one of the fins broke. I had to reattach it with more clay. It worked, but barely.
I used the Oven Craft type clay, as I don't have access to a kiln. I've used it before and it works well for my purposes. When it was finished baking I painted it with watered down acrylic paint so the terra cotta color would show through (complete with silver wash for a fishy sheen). After painting, i put a coat of clear glaze on top. I used the shiny kind as I thought it might look more like real ceramic glaze... but I was wrong. In the future I will use the pearl finish glaze. The circular globs on the underside are intended to help prop the fish up into it's tray shape once solidified and displayed (again, the most complicated part).
Some day I will try my hand at more abstract clay shapes.
September 24, 2011
Felt Flower Brooch
This felt flower brooch tutorial was created by Meagan Reardon of Not Martha. It's a fairly quick and easy project that can make great gifts! Below is a photo log of my progress...
Different from Meagan's tutorial, I used a glue gun instead of Fabri-Tac and I think it worked well. It leads to a little more clean up at the end due to glue threads everywhere.. but for the sake of speeding up the process it's worth it.
I plan on trying this out again with smaller petals and different colors to make a more dainty brooch or fridge magnet!
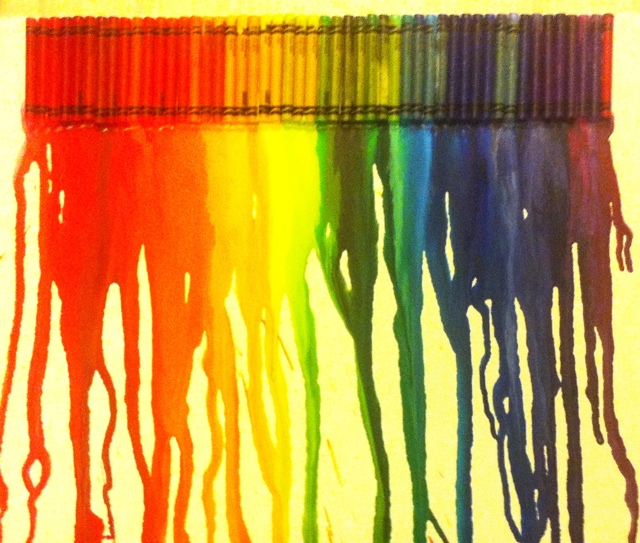
Crayon Art
It's getting harder to hide the fact that I love rainbows.
I had seen versions of this project on a few blogs and knew instantly that I had to have one of my own. Here it is.. a Crayon masterpiece.
I was hoping I could arrange the crayons in a way that represents the visible spectrum of light. This is the prettiest and most rational arrangement IMO. It's a little tricky though because the crayons are not arranged in the box this way.. and the color of the crayon wax itself is quite misleading. A dark colored wax does not necessarily produce a dark colored marking on paper. So I had to test all of them before deciding on the best arrangement. I also had to reject the colors that didnt fit into the spectrum (except a few pinks obviously)
Rejects.
Once the arrangement is established, the crayons are placed on the canvas to see how many can fit.
Then they must be glued in place. I decided to leave a space on either side of the crayon train to allow room for diagonal drips. I used a glue gun - I'm not sure if there are more suitable options out there or not. Glue gun glue doesn't seem to stick to canvas (or other smooth-ish things) very well and I suspect repairs may be in order some day.
Then I put it in the oven, half a canvas at a time because the whole thing wouldnt fit. It's a tiny oven. I wasn't sure if it would work.. but it did! the crayons melted quickly, then I took the canvas out and held it upright so the melted wax would drip.
drip drip.
Subscribe to:
Posts (Atom)